DIY Hub
How to install a shade sail
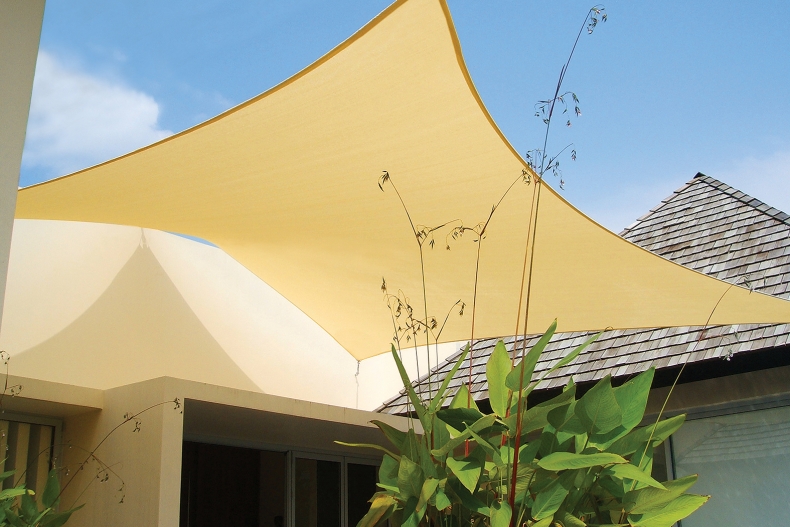
Before you commence installation it is very important that you consider the most suitable location for your shade sail(s) taking into account the factors below. We've also prepared a 10min video that takes you through how to install your shade sail.
Before you commence installation it is very important that you consider the most suitable location for your shade sail(s) taking into account the following:
- Size of the shade sail(s)&
- Strength of existing structures intended to be anchor points
- Ability to insert fixing posts
- Location of barbecues
- Sun direction etc
Watch the video
This short video provides a simple overview to installing a triangle and square Coolaroo Shade Sail.
There could also be other factors, specific to your situation, which require consideration.
Installation Tips
Before you start
There are some important factors you need to consider before you get started. Let's take a look!
- Determining The Correct Fixing Points
Once you have identified the location for your shade sail(s) it is important to determine the most suitable fixing points for the corners. Some of these fixing points could already exist e.g. pergola/sundeck, large tree, fence post or fascia.
This stage of the installation is critical. You should ensure all fixing points are structurally sound and if unsure, obtain independent advice from a builder or engineer.
- Building Approvals
Prior to installation, check with local authorities for any relevant building regulations which may exist.
- Selecting Fixing Accessories
There is an extensive range of fixing accessories available to help you secure your shade sail(s). These accessories are readily available from your normal hardware supplier.
Rope/chain - to extend your shade sail to a fixing point if required.
Select the fixing accessories which best suit your own installation.
Attaching to Existing Supports
- Attaching To Fascia
If you intend to fix your shade sail to a fascia the use of a Fascia Support is strongly recommended. The Fascia support is used to connect the overhangs of rafters or trusses to fascias ledgers giving a strong connection between the two and improved strength.
- Attaching to trees
We recommend that the fixing of shade sails to trees be for TEMPORARY USE ONLY. The diameter of the tree where the sail will be fixed must be at least 250mm(9.75”).
Attaching to additional supports
- Post Supports
If additional posts are required, the use of treated softwood (H5 level treatment) is recommended. Hardwood of durability Class 1 can also be used. Your local timber supplier can assist you in selection. Post lengths should be calculated taking into account the proposed height of your sail plus the depth of your footings.
Steel posts are also suitable and are available from either your normal hardware outlet/home centre or your local steel supplier. Steel posts can be cut to predetermined lengths and painted to a colour matching your shade sail and the environment.
Footings
Measure out centres of footing positions and mark as illustrated. Dig holes 400 mm (16”) sq. & 800mm (32”) deep.)
- Firm Ground
Lay a 100mm (4”) depth of 20mm (3/4”) dia gravel at the base of the post.
- Soft Ground
Pour a 100mm (4”) depth of concrete at the bottom of the hole to provide a solid pad. Insert the posts and, with string lines, ensure they are in plumb alignment. Temporarily brace the posts.
- Concreting
Mix concrete in line with manufacturer’s instructions. These will be labelled clearly on the packet. Your supplier will be able to give you any special advice you may require for your own conditions. Pour concrete to the top of the holes ensuring it is packed well. Ensure the concrete surface is sloping away from the posts to assist water drainage. Allow poles to set in concrete for a minimum of 48 hours. Brace if required.
Installation
Connect fixing accessories to mounting points as required. Ensure all connections face towards the middle of the sail and are tightly secured. Check again to ensure all mounting points are solid. Lay your shade sail out and commence the installation.
Tensioning
Using the selected fixing accessories, commence connecting the corners of the shade sail to the fixing points.
Connect all points, using a ratchet tensioning tool if necessary to gain increased leverage. Stop tensioning when the shade sail is rigid with little or no creases. CAUTION: Do not over tension. Re-tension periodically if required.
Warning
Your Coolaroo shade sail is designed to provide UV protection and comfort in domestic areas. When selecting the position for your shade sail, ensure all fixing points are structurally sound and fixings are tightly secured. Inspect regularly. Prior to installing, consult your local council regarding building regulations which may apply in your area. Exposure to certain chemicals e.g, Chlorine can lead to the premature breakdown of the fabric. Chemicals to be used on or around the fabric should be referred to Coolaroo prior to their use.
Do not have fire or an open flame close to the fabric. Do not use your barbecue under the shade structure.
Care Instructions
Your shade sail(s) may be cleaned at any time using a solution of mild detergent and water. Apply the solution with a sponge or a very soft brush. Let the solution stand on the fabric for 10 minutes and rinse thoroughly with water from your garden hose.
DO NOT put the fabric in your washing machine, clothes drier, or scrub it with a stiff brush, scouring pad, or an abrasive cleaner.
For more information about shade sails check out our articles on choosing the right shade sail and DIY shade fabric installation.
Find specific instructions on how to install the Coolaroo 3.6 x 3.6 Triangle Sail Shade here.

_Article-04_(The-benefits-of-keeping-a-shade-garden)_242_164_s_c1.jpg)